 TEXTILES.ORG
Follow these steps to make simple repairs to damaged tent tops.
The most common types of damage to tent tops that tent rental companies repair on their own are pinholes and simple cuts. Liquid vinyl is appropriate for pinholes—about the size of an eraser head or smaller. The next step up, especially for a repair at an installation site, is HH-66 (clear vinyl cement).
Heat gun repairs done in your facility are superior to in-the-field options. But first, you’ll need to decide whether you can make the repair on your own rather than returning the fabric to the manufacturer. Here, the location of the damage and what else is compromised are more important than simply size of damage. For example, in the case of a pole tent, you may think that you have a simple cut, but as you inspect it, you see that there is a cut in the webbing. That webbing is instrumental in the rigidity and structure of the top. Unless you have the sewing equipment and knowledge to make that kind of repair, you’ll need to return it to the manufacturer. Damage that requires partial or full panel replacement generally goes back to the manufacturer as well.
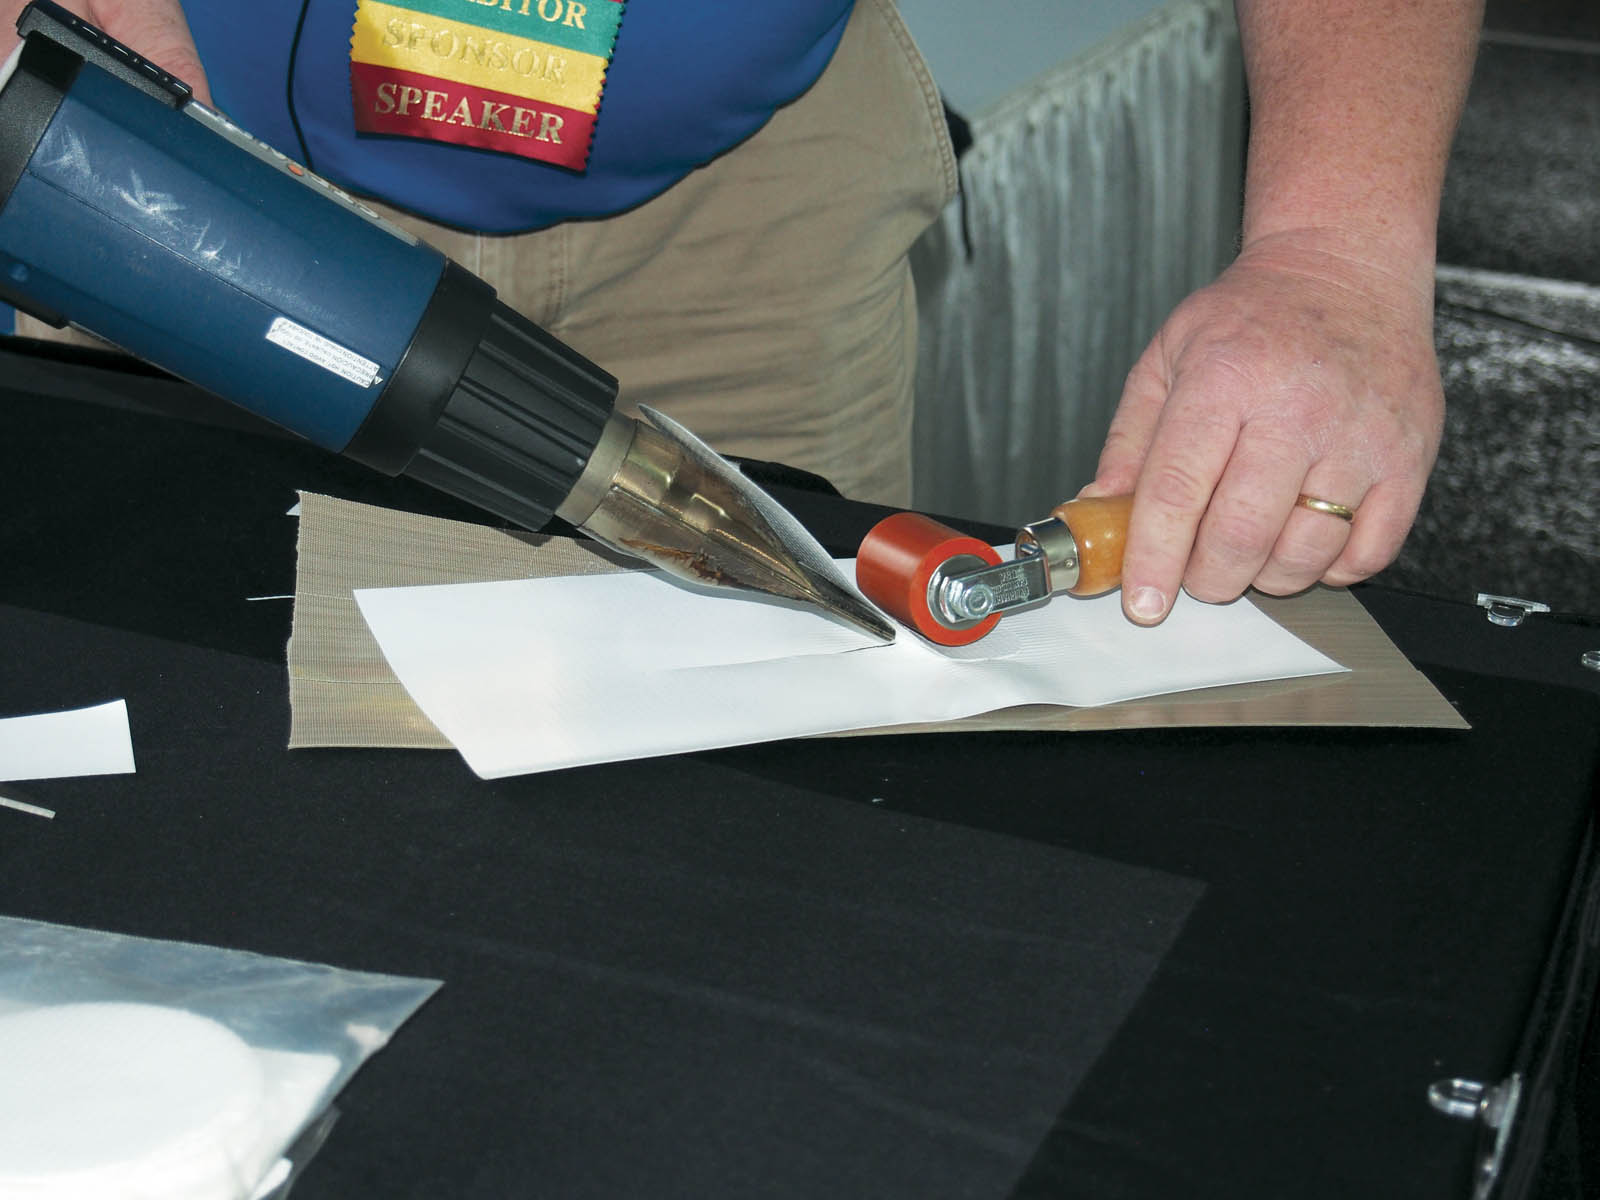
To repair tent fabric with a heat gun, you will need a large, stable, flat surface (for tent rental companies, a banquet table would suffice) and a substrate to cover and protect the surface from the heat gun. The heat gun itself must have a flat nozzle (not a round paint remover–style nozzle) that can spread the heat evenly between the damaged tent material and the patch material. You’ll also need a silicon roller tool, cleaning solvent, scissors and the patch material. It’s critical that the patch material is the same material as the tent fabric, because different fabrics bond at different temperatures. Get this from the manufacturer.
If you don’t have a lot of experience making repairs with a heat gun, practice on scrap material first. You risk further damage if you aren’t skilled at this type of repair. When you are ready to make the repair, follow these steps:
- Prepare the damaged fabric to receive the patch by cleaning it with acetone, rubbing alcohol, toluene or methyl ethyl ketone (MEK). These solvents are compatible with vinyl fabric and contact cement. The surface area must be dry before proceeding.
- Cut a round or oval patch that is a minimum of 1 inch larger than the damaged area, or the width of the heat nozzle and roller. If you are using a square or rectangular patch, round off the corners to improve the edge bonding.
- Place the fabric to be repaired on the work surface with the top side of the tent facing up.
- Place the patch material over the repair area so that it is evenly spaced all the way around. Line up the scrim pattern of the patch with that of the tent top.
- Position a silicone roller at one end of the patch. Using the heat gun, apply a moderate amount of heat (enough to melt the surface, but not burn) between the patch and the tent material surface, holding the heat gun in front of the roller. Slowly move the roller across the patch.
- When the patch starts to melt, continue to work the heat gun and the roller to remove welts and ensure that the edges are bonded.
- Turn the tent fabric over and bond the edges of the patch area on the other side.
- After the patch has cooled, check the edges to ensure that they are properly bonded by feeling for loose edges. If you discover any, repeat the process.
- When finished, clean the roller tool with the same solvent used on the tent fabric.
Always remember, damaged tent tops must be repaired as quickly as possible. If you install a damaged top, that damage is going to find the next weakest link—a rip or a tear, some sort of a hole—that’s only going to get worse as Mother Nature works on the tent. Truly, certain kinds of damage, if not repaired right away, can affect the rigidity of the tent and its ability to withstand the elements.
by Bryan Bolt, technical solutions manager for TopTec Event Tents, Moore, S.C. This information was part of a Tips & Techniques educational session led by Bolt on tent repair basics at Tent Expo 2019 in January.
Be ready to make temporary repairs at installation sites with fully stocked repair kits in every tent delivery vehicle. Kits may include:
- Self-adhesive patches in a variety of sizes for temporary repairs
- Liquid vinyl
- HH-66 (clear vinyl cement)
- Scissors
- Rubbing alcohol
- Repair clips
- 12-by-12-inch patch sheets with no adhesive
- Pencil
- Palm sewer
- Webbing
- Bullet for keder and keder repair supplies
- Grommets, grommet tools and a dead blow hammer for grommet repair