 TEXTILES.ORG
The latest printing technology offers better options than ever to make your clients’ tents stand out in a crowd.
by Laurie F. Junker
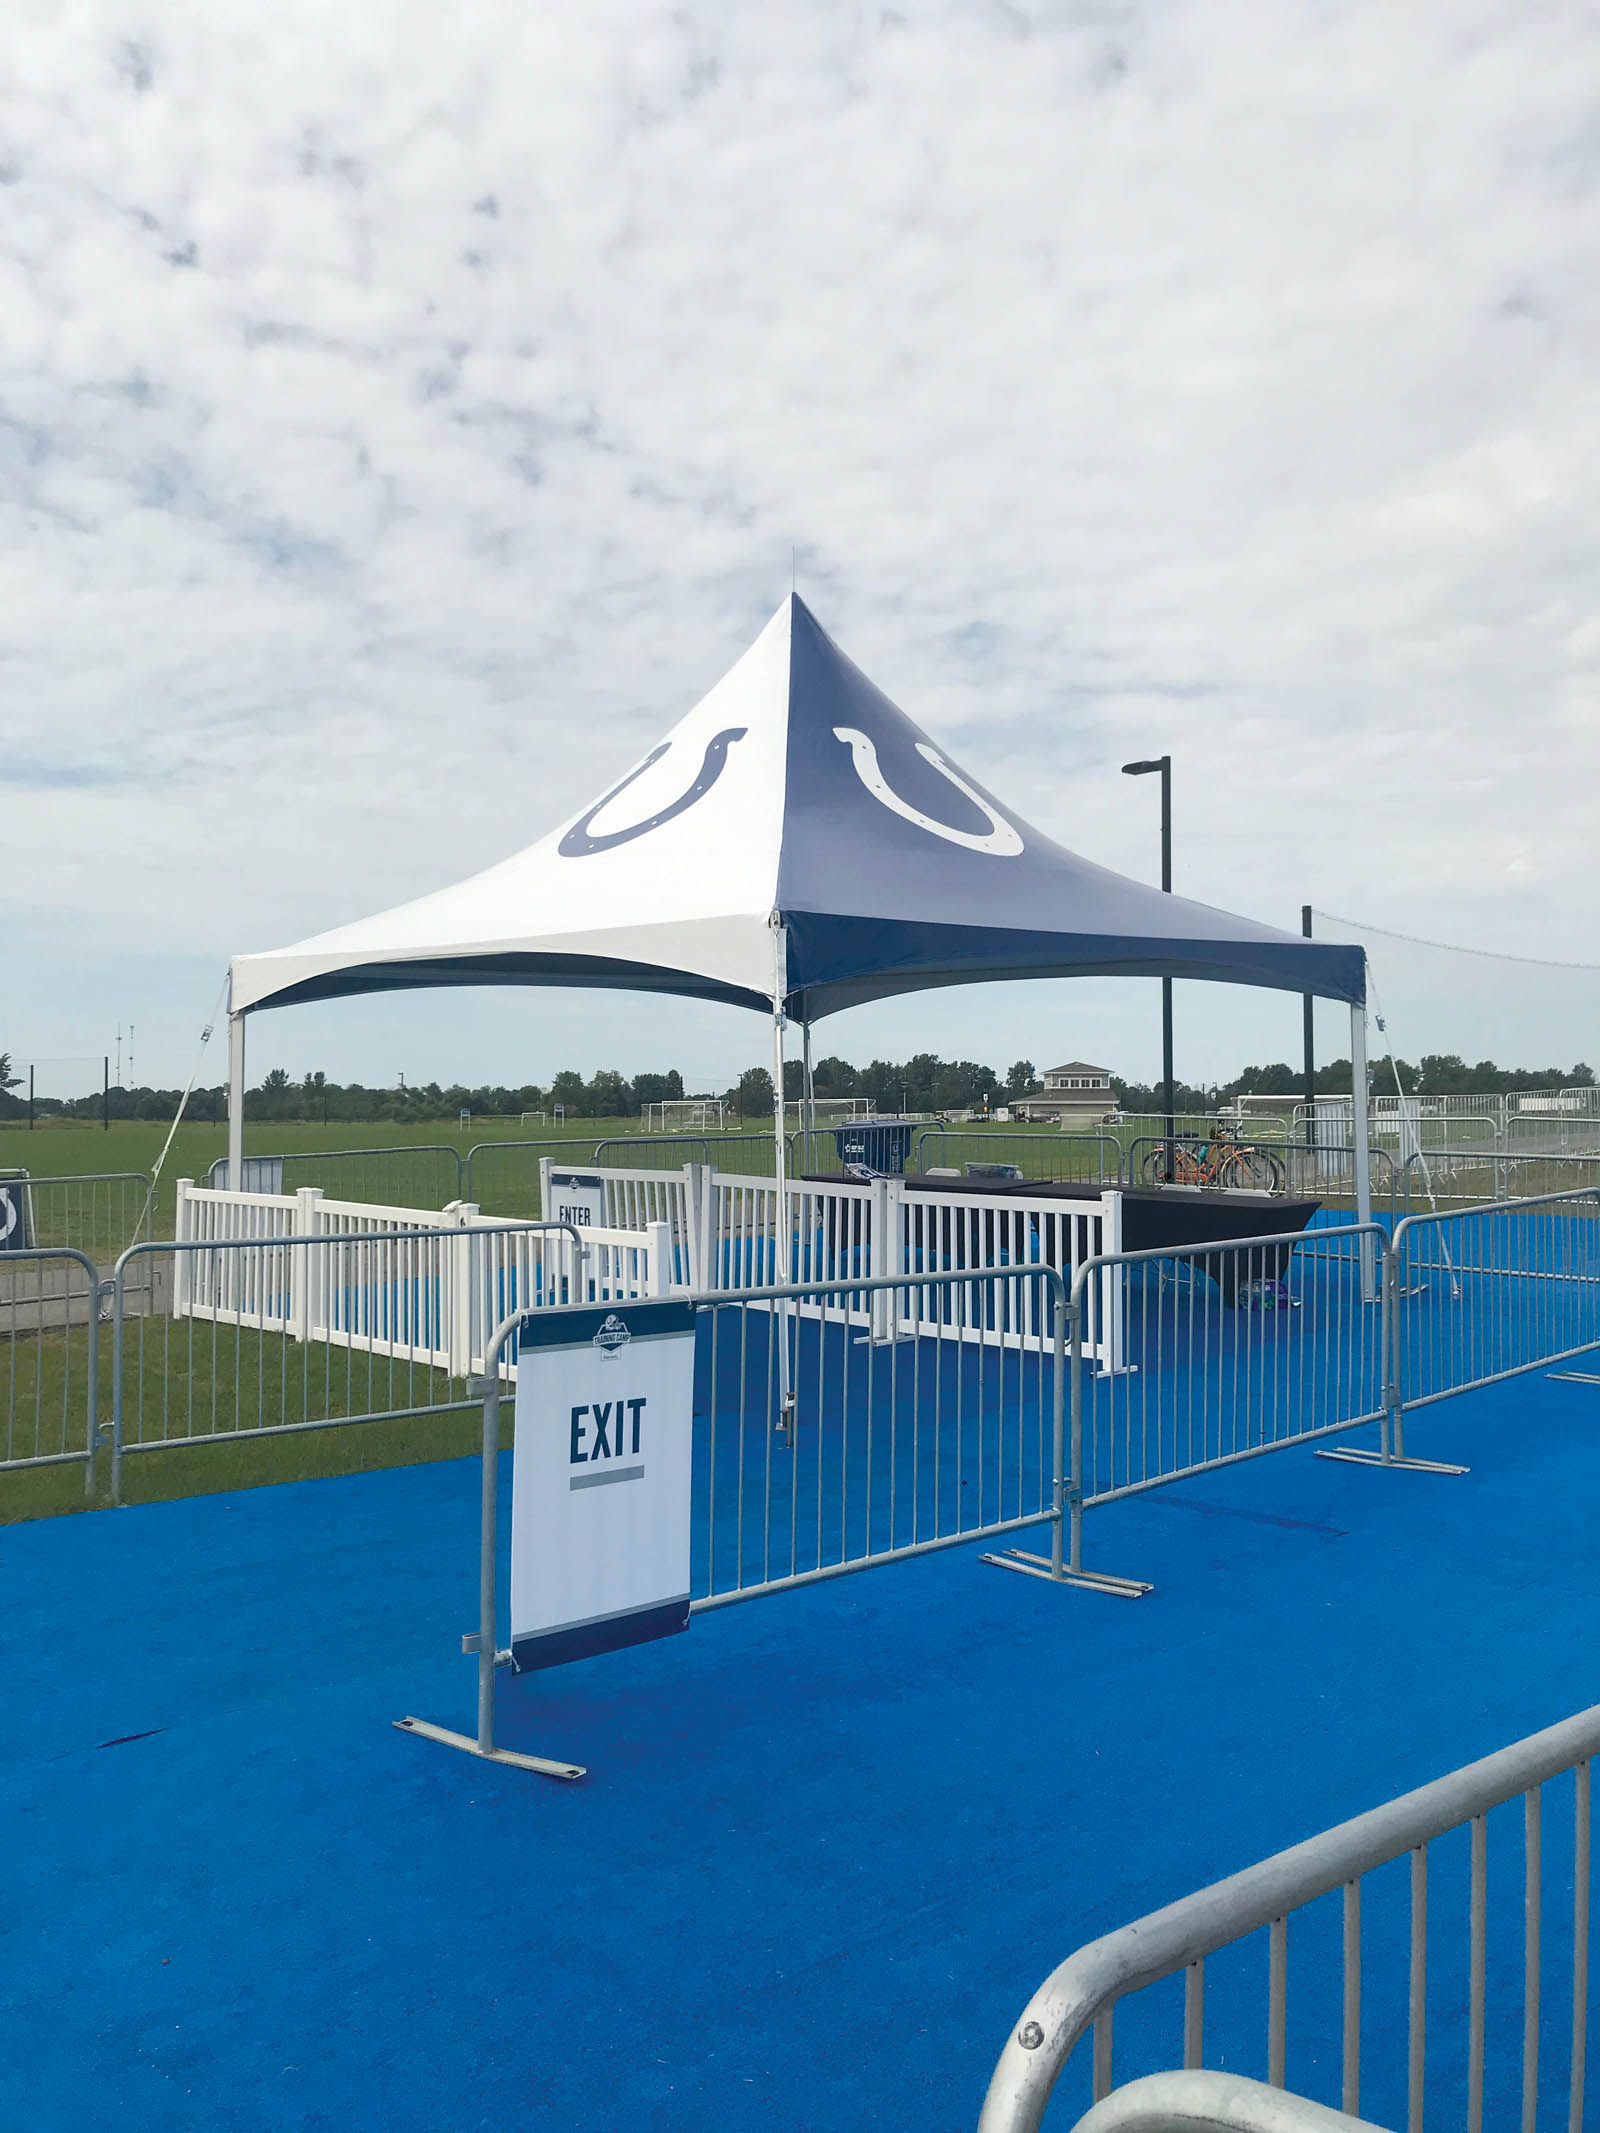
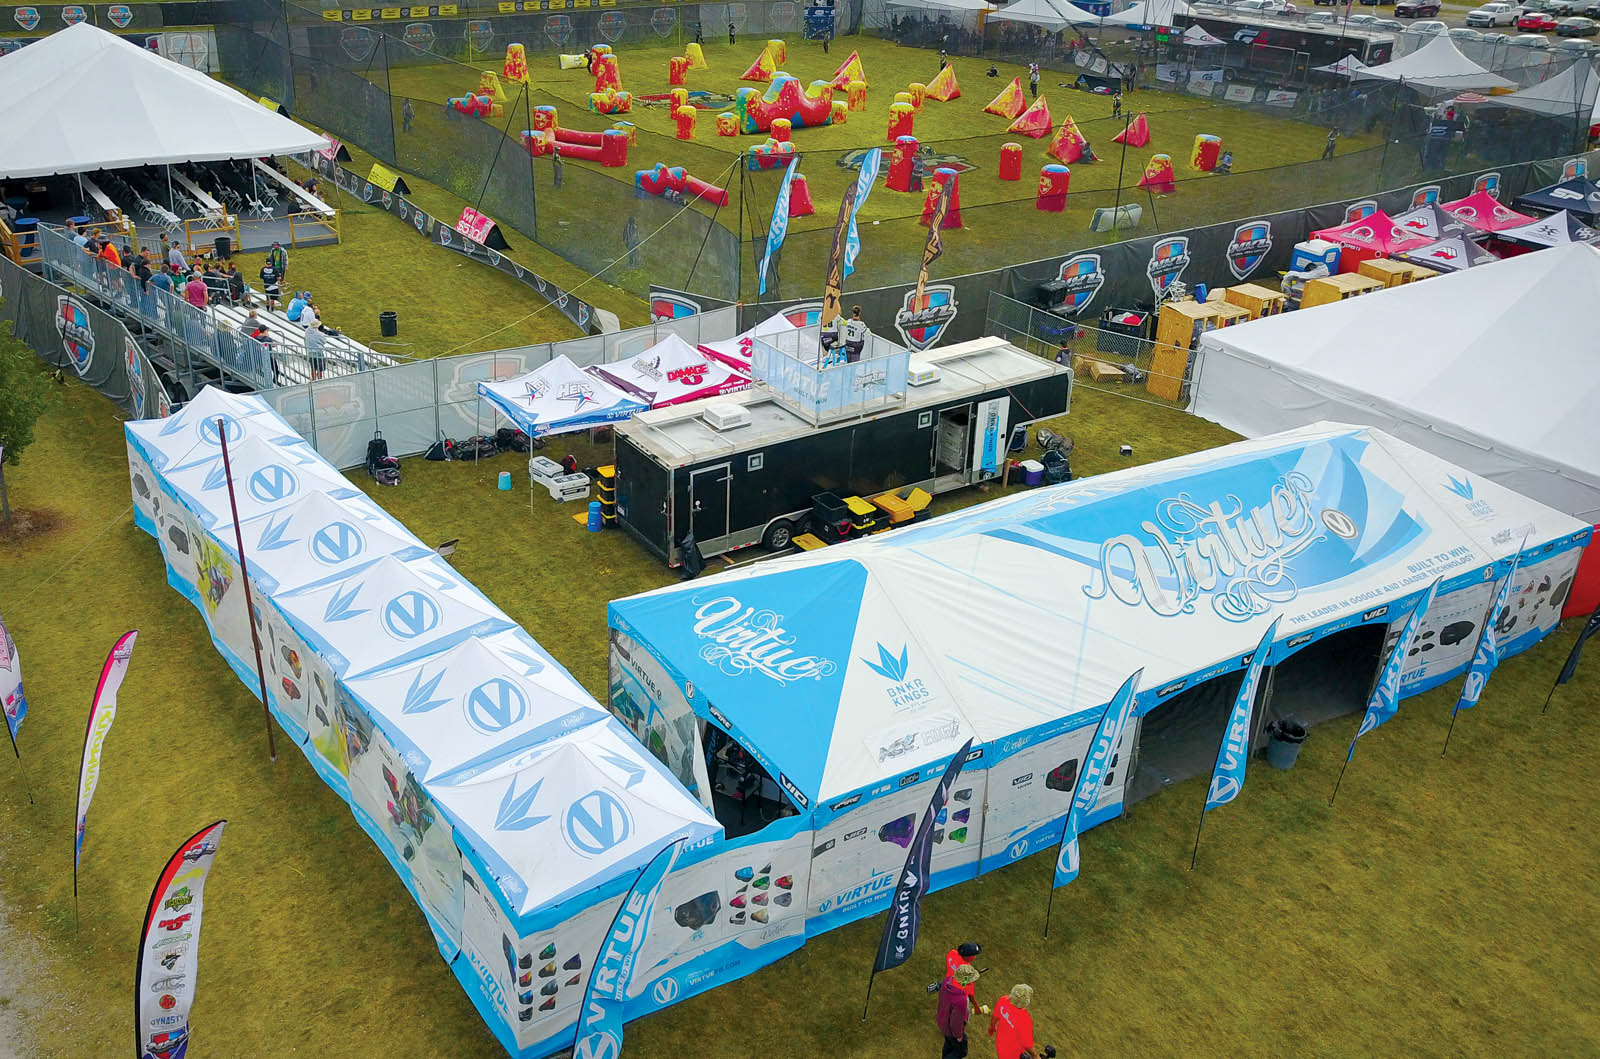
Big event tents and bold graphics go hand in hand because customers recognize the importance of branding, particularly at trade shows and public events. In these settings, custom graphics serve both logistical and strategic purposes. They make it easier for attendees to locate a particular tent and reinforce the brand identity of organizations through specific colors and images.
But simply putting a logo on a tent isn’t enough for some of today’s customers, according to Fred Tracy, president of Fred’s Tents & Canopies Inc., based in Waterford, N.Y.
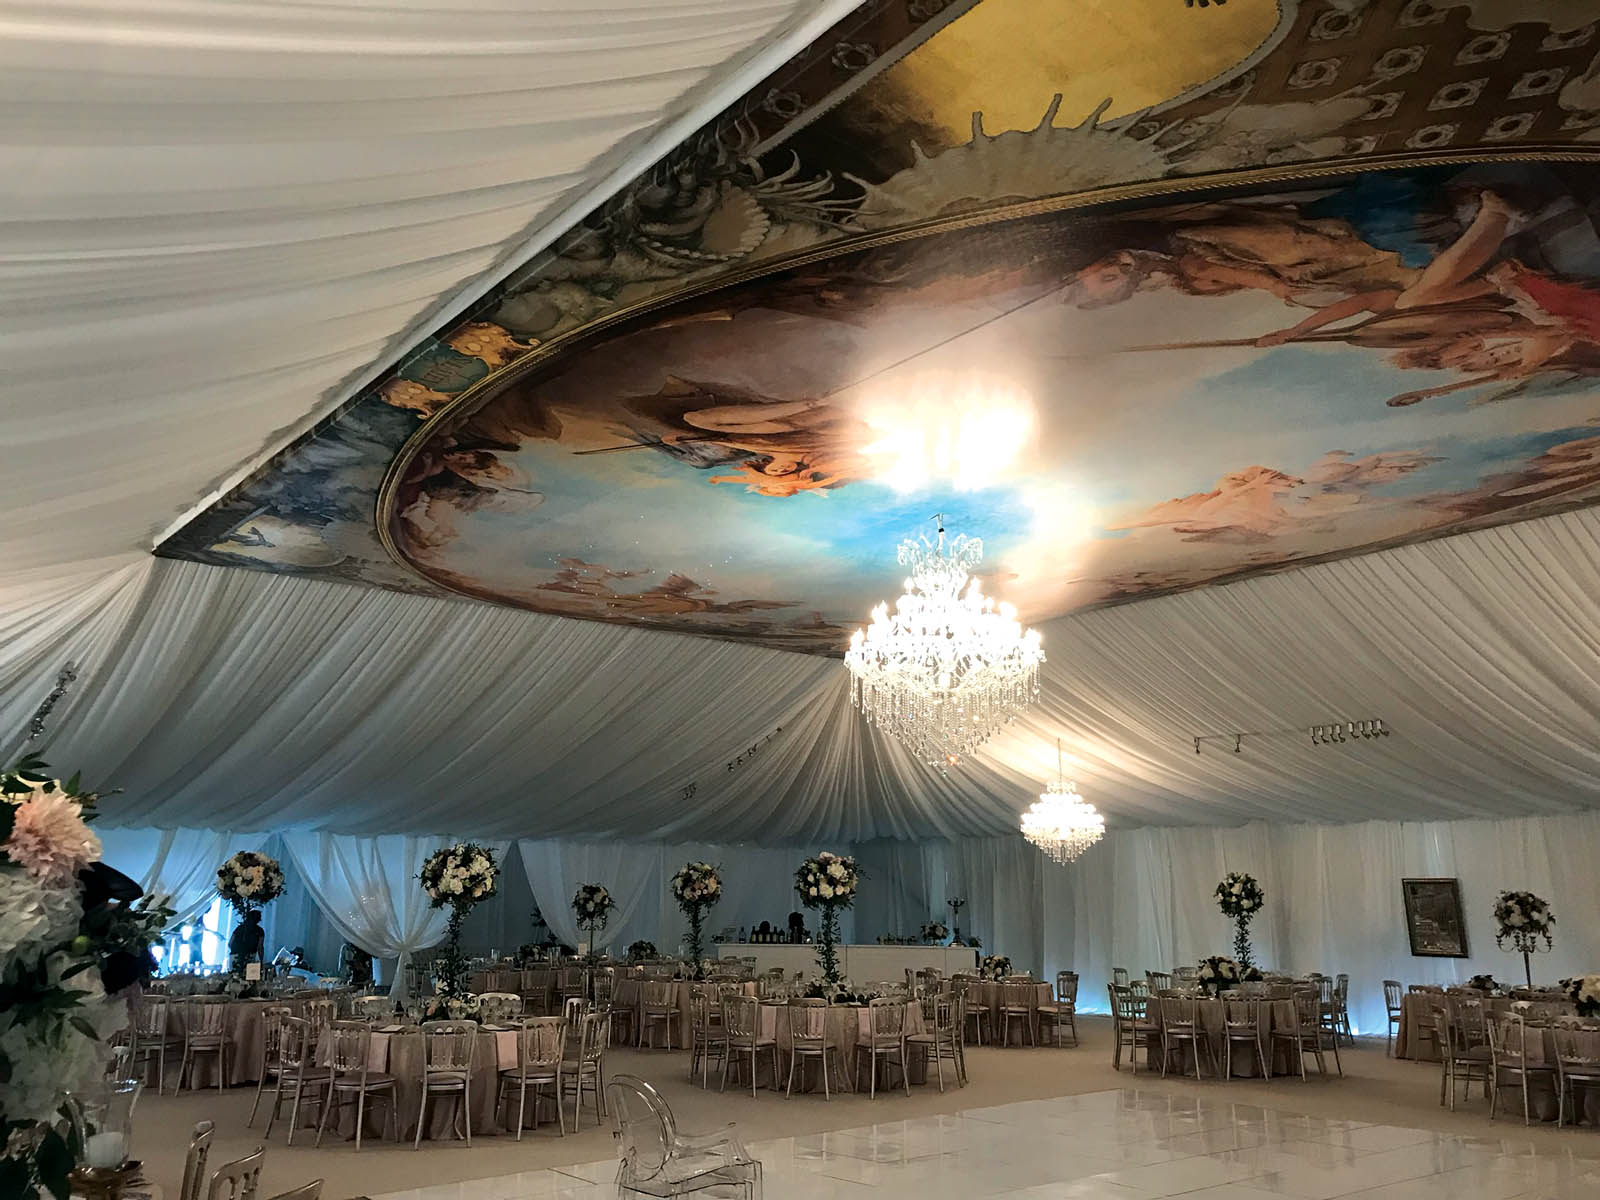
“In years past, when people thought of tents and printing, it was all about branding with a corporate logo,” he says. “These days we’re looking to create a total atmosphere; for example, a tent that feels like an old barn for weddings or one that looks like the French Riviera for a corporate event.”
Printing and ink technology have evolved to a point that digital printers can now accurately reproduce detailed designs and colors onto tent fabrics. Some are also able to print on substrates such as plywood or carpet so that customers can think beyond tent panels to create features such as floors that are printed with logos or insignia or made to look like marble or hardwood.
And don’t forget the frame—Tracy recommends considering the poles, beams and other tent framework as part of the design. For example, a faux wood finish can be applied to the poles on a barn-themed tent, which Fred’s did for a client of Chattanooga Tent & Event Solutions, Chattanooga, Tenn.
With today’s printing technologies, just about any surface in a tent can become a part of the end user’s complete custom design. With a little understanding of inks, colors, placement and the design process, you can help ensure that your client’s tent is the center of attention at any event.
Inks and color selection
Hand painting, perhaps the oldest technique for applying graphics to tents, is still used, particularly with light-colored designs on dark materials. But most tent manufacturers now print graphics using digital printers with solvent, latex and UV-based inks. Solvents are a traditional choice for outdoor signage and hold up well but are considered less eco-friendly because they release harmful fumes when drying, and they take longer to cure. For that reason, many manufacturers have moved to latex or UV inks, which don’t off-gas and require less drying time than solvent inks. This can mean quicker turnaround for events with a short lead time.
“Ten years ago, a printed tent top would take three to four days to print and would be pixelated,” says Charlie Rueb, program manager at Rainier Industries Ltd., based in Tukwila, Wash. “Today they can take hours and be photorealistic.”
Rainier has moved to water-based UV inks for their durability and faster drying time. An additional advantage of UV printers is that they can print on any color fabric, not just white, and they can print directly on almost any rigid flat surface. Both latex and UV inks are somewhat less scratch resistant than solvent inks, but durability can improve with additional curing time.
Color is another consideration for tent graphics. Color can make a tent stand out, and many companies want the exact hues that match their corporate branding. Clients generally identify those colors using the Pantone® Matching System (PMS). The challenge, according to Lindsey Berlin, marketing manager at Anchor Industries Inc., Evansville, Ind., is that digital printers use CMYK colors. Finding the right match between the two is key. Having the client identify specific PMS or CMYK colors can eliminate miscommunication about exactly which shade of a particular color the client wants, and usually a satisfactory color can be found.
“We recommend Pantone colors and offer proofs and/or printed samples to ensure the customer can approve the color match before going to print,” Berlin says. It’s worth noting that improvements in technology and coatings mean there’s less fading than in the past. Still, certain colors hold up better over time, and many agree that less saturated hues seem to fade faster than other colors.

Design and placement
Making sure the printed graphics match the client’s specifications is always critical, and with increasingly elaborate (and expensive) graphics, it’s more important than ever, according to Chessey Brodbeck, print account manager at Celina Tent Inc., a tent manufacturer based in Celina, Ohio. Successful tent graphics start with a creative design that’s either provided by the client or created by a tent manufacturer’s in-house design team. This might include an additional charge depending on the complexity of the design, but it guarantees that the graphic designer is experienced with tents.

“There can be advantages to working with people who have lots of experience designing tent graphics and understanding proportion, placement and what works best on tents of different shapes and sizes, so most customers feel it’s worth the additional cost,” Brodbeck says.
Placement of graphics, particularly when a limited amount is used, often depends on the type of event and the distance from which the graphics will be viewed. Most manufacturers generally agree that tops and gables provide the most visible placement because those spots are above the crowd line and front and center. Sidewalls are another good option because they’re flat and offer a straight-on viewing angle.

Interior graphics are another consideration. Suzanne Warner, vice president at Tentnology®, a tent manufacturer based in Surrey, British Columbia, Canada, recommends interior wall graphics, especially for trade show booths. “Most clients want to capture attention, and tent graphics are very effective regardless of weather or crowd size,” she says. “We frequently suggest adding dynamic lighting for longer-term tents, so the entire structure can morph over the course of a day and surprise and delight.”
When the customer provides the design, it’s important that the digital artwork is of a high enough resolution to be used on a large tent. High-resolution images have a dense image quality—they have at least 300 pixels per inch and retain their sharpness when enlarged. Low-resolution images have fewer pixels per inch, and when they are enlarged, the image is pixelated, or blurry.
Explicit customer approval before production begins helps avoid expensive mistakes. “We require an approval signature on the rendering before sending any artwork into production,” Brodbeck says. “This ensures the customer is double-checking, and we know for a fact the artwork is approved before we start manufacturing the product.”
Budget-friendly graphics
Decals and stickers can be a cost-effective way to apply custom graphics to a tent, particularly for short-term or onetime use. The graphics are cut from colored adhesive vinyl or printed onto adhesive vinyl and then applied to the tent panels. Most are removable—for onetime use or to store for a future event. They can be applied before a tent is delivered to the installation site or applied on-site.
“Adhesive graphics can be a great choice for clients looking for a lower cost option, because the graphic can be removed and the tent panel returned to inventory,” says Greg Spitzer, design manager with tent rental company Arena Americas, based in Oak Creek, Wis.
Vinyl decals are prone to bubbling and/or peeling over time, so these kinds of graphics are best suited to shorter-term use.
Another approach to achieving the impact of full graphics at a lower cost is with stock tents. A red, white and blue patriotic tent or a tent striped in local school or university colors can make a big statement and be rented over and over to a variety of customers.
At any budget level, graphic solutions offer a way for tent rental customers to distinguish themselves at their events. From the big corporate brand that wants to make a statement to the wedding client who wants a totally custom look, tent graphics can deliver eye-catching, one-of-a-kind aesthetics.
Laurie F. Junker is a freelance writer based in Minneapolis, Minn.
SIDEBAR: Roll with it
Proper care and storage of tent fabric with printed graphics can make all the difference when it comes to longevity, according to Ruben Divine, graphics manager at Ringgold, Ga.-based Allstate Tent. He recommends washing with plain water or a gentle cleanser and always allowing the tent fabric to fully dry before storing to avoid mold or mildew growth.
“Be sure to avoid any type of hard folding, especially where the graphics are printed,” he says. “If you roll the tent with the graphics facing out first and then gently fold on the non-graphic areas, this will help avoid breaking down graphic inks and make your tent last longer.”